Friday, December 12, 2014

Sock yarn

I got it in my head awhile back to make sock yarn, just to see if I could.

There's a lot of details you want to get right about sock yarn.  It has to be strong, if you don't want your socks to wear out, but it should also be somewhat elastic.  For this reason, semiworsted spinning is often preferred.  Blue-faced Lancaster is one popular wool for sock yarn; others prefer superwash or one of the felt-resistant down breeds like Devon.  I only had Rambouillet, so that's what I used.

I used the wool I had dyed previously with black walnuts, coffee, and food coloring.

 I spun it pretty much as fine as I could, which wound up being about 60 wpi in the singles.


I aimed for about 400 yards, which apparently is what you need for an average pair of socks.  You should be able to get that out of 4 oz. of wool, but I have no idea what weight I used -- I don't have a scale.

Then I three-plied the yarn, for extra strength.  Three-ply is a big hassle compared to two-ply -- half again as much spinning to do, and then three balls of singles trying to get away from you as you ply -- but the results are definitely more durable.


 The final thickness of the yarn was 22 wpi -- good for knitting on size 1 or 2 sock needles.

I was really happy with the way the colors blended and interacted in this yarn.  The color changes happen every 30 yards or so, shifting from green with bits of yellow to brown with bits of green.  If I knit it up, I'd find subtle bands of colors interacting.

I had a goal in my mind while I spun this yarn -- to get it done before my daughter was born in late August.  I had my doubts that I'd make it, considering what slow going it was and my history of going into labor early.  But in the end, I did get it finished with several days to spare.

My intention was to sell this yarn.  And it's certainly good enough -- it is truly fabulous yarn, strong, soft, springy, and just beautiful.  Not a lot of flaws in it anywhere.  However, considering it took me a month to make, I'm not sure how I'd price it.  Most spinners agree that charging less than ten cents per yard per ply is undercutting those who spin professionally, making it impossible for them to make a living.  So that would give me .... 400 yd x 3 plies is 1200 ply yds; 1200 x 10 cents is $120.  As a minimum, not counting the high quality of the wool or the natural dyeing.

Do you know anyone who would pay $120 for socks, even the world's most gorgeous socks (as these certainly would be)?  I have my doubts.  So perhaps someone I know will have to get a truly princely gift.  You see why handspun available online is often in small hanks -- 100 yd of singles, for instance.  Spinners can make more, but not many can afford to buy it.

More pictures of my absolutely gorgeous yarn:


So far it's the spinning project I'm proudest of!

Friday, July 25, 2014

Color blending

Once you have wool in the colors you want, then you have a vast array of choices when it comes to blending it.

If you want, you can actually just spin the wool white and dye it after.  You can do it a solid color or make stripes by handpainting it.  This produces fine results, but it seems to spoil some of the point of spinning it myself -- that is, the much wider variety of color effects you can do when you're spinning, and also the sheer joy of watching pretty-colored yarn wind onto your spindle.

The next simplest thing is to make a roving or rolag and handpaint that.  That is to say, that's what a lot of people seem to be doing.  You can spin it all as it comes in the roving, or you can split the roving lengthwise and use a piece for each ply so that the color shifts in the different plies match up.  Or you can split it some other way and deliberately have the color shifts not match up.  If all the colors go together well, it's actually a neat effect -- like one set of stripes overlaying another set of stripes.  Where your two plies are different colors, the colors seem to blend, producing a heathery orange effect even though you know you are seeing red and yellow.

Because I like to start from the very beginning, what I wanted to do was to dye the wool in different batches and then blend it myself as I was processing it.  There's a lot of ways to do this too.  People who have a blending hackle can put all the different colors on there and then pull it off with a diz into a nice little roving -- like a handpainted roving, except that the different colors will shift into one another a bit more gradually, and you have more control.  I don't have that kind of equipment though, just handcards.

I discovered, while trying to make a blue and green yarn and winding up with turquoise, that if you take two colors and card them together, you can mix them together completely.  Sure, if you get close, you can see the hairs are different colors, but from even a foot away, it looks like a complete blend, as if you'd blended paint.


Why would you do this instead of just dyeing the wool the color you wanted?  Well, some people like the greater depth of color in blended wool.  Another factor is that dyeing can be iffy business, especially if you're using natural dye, and it's nice to know that the not-quite-right yellow you accidentally got can be mixed with some blue and give you a nice green.

I found that if I wanted clearly visible variegation, I could only card once or twice.  So it worked best to card the different colors separately until they were smooth and even, and then blend them together on the carder into striped rolags.


Kind of hard to tell in the picture, but this is the brown, green, and yellow wool from last post.  Each rolag has visible bands of the different colors, and those show up in the yarn.  If I were making a chunky yarn, I'd probably have a couple of feet (translating into a small group of stitches, if you knitted it) of each color.  Since the yarn is very thin, each band of color gives me several yards.

Then, of course, I'm going to ply it.  Since the rolags are pretty random and don't match each other, the plies won't match up.  (I could make them match by Navajo plying, which is a neat little technique that lets you keep the color changes together.)  So the resulting yarn, when it's knitted up into socks, will look heathered, but with changes from row to row -- a row or part of a row that's yellow and green, and then a bit that's green and brown.

This yarn, which is Icelandic dyed with red, orange, and yellow food coloring, is another example.  This one, I experimented a lot with blending methods, but overall the color changes are much longer than the green yarn.  There are 10-30 yards of one color at a time in each ply.  The result will be much bigger stripes and blocks of color -- but still heathered within each stripe, because the three plies of the yarn don't match up.  So there might be an inch in the finished item that's red and yellow, and then an inch that's orange and yellow, giving an impression of a lighter orange.  However, it's deliberately pretty random, so there won't be consistent stripes.


In this yarn, I thought that the green I started with was too bright, so I blended in some llama fiber.  That dark forest green?  That is bright green plus brown, very thoroughly blended.  I made a whole new color, and though you can tell it's not a completely solid color, it doesn't look like bright green and brown anymore.


Here, I blended green and blue in a gradient -- first, just green, then green with a little blue blended in, then a lot of blue, and finally all blue.  The rolags aren't so throroughly carded as to make one color; there were chunks of blue and of green in the rolag and you can see them in the yarn.  Since I didn't want a heathered effect with the different plies, I Navajo plied the yarn.


Color blending is a little intimidating.  It's hard to get the results you want in the roving, rolag, or batt; then it's hard to imagine what the yarn you get might look like.  At every stage you have control and can do a number of different things with the same materials, but it requires a good bit of imagination to picture what might give you the results you want.  All I can say is, it's been nice making a wild guess and seeing what I end up with.  The more I do it, the more clearly I can predict what it might take to get a certain kind of finished project.

Fun with dyeing


Part of the fun of spinning is picking the color combos.  Some people get this joy just by browsing colored rovings on Etsy and buying the colorways they want.  For me, addicted as I am to doing every part of any craft I do, that's not good enough.  I want to select the actual colors I imagine and do the dyeing myself.

The trouble is that of the three kinds of dye -- food coloring, plant dye, and chemical dye -- nothing quite suits.  Chemicals don't suit my aesthetic, which prefers the natural and safe.  They also have to be specially purchased, and I am always on a budget.  Food coloring at least is safe, so I don't need to use special separate pots to do it in, but it takes a lot to get a deep color.  I always wind up with pastels, and even if you use a ton, you usually get bright candy colors.  Sometimes I like that, but sometimes I want deep rich colors, and that's hard to get with food coloring.

But natural dyeing is a whole different ball of yarn.  Each dyestuff you might want to use has its own rules.  Indigo dyeing is completely different from safflower dyeing which is completely different from lichen dyeing.  Some colors, like blue, are notoriously hard to get, and most everything you can find will give you shades of yellow or brown.  Bright colors of any kind are very hard to manage.  The really nice natural dyes -- indigo, cochineal, logwood, fustic -- are almost certainly not available growing wild near you.  You have to order them online, and they're pricey.

Here, for instance, is my experiment with black beans.  Black beans are readily available, which is a big plus, and they make blue shades, which is even better.  But because the color is destroyed by heat, you have to do all the dyeing completely cold.  That seems to result in the dye not taking as well as it otherwise would, and a lot of people report it fades in the sun.  (Superwash yarn seems to take the dye best, but I don't have that.)

So this blue-gray was the best I got, from four ounces of wool and two pounds of beans:


But it occurred to me lately that I could compromise by combining natural dye, those ones I could easily get, with food coloring.  That way I could get some depth and murkiness from the natural dye and add on some bright, clear color with the food coloring.

So far I've only tried this approach once, for a colorway I've been dreaming of which is inspired by the colors of the forest floor.  Forest green, olive green, brown, and a little yellow for the sunshine.

I did two different kinds of wool in this colorway -- unprocessed Rambouillet (this stuff is CRAZY soft, I may never use anything else, even if it is very greasy and hard to clean) and Icelandic roving.  First, I dyed one batch with black walnuts.  This is very simple -- first you boil the black walnuts in water, then you strain them out and simmer the wool in the water.  Simmering unspun wool is risky business because you can felt it if you're not careful, but by not touching or agitating it at all until it was cool, I didn't have any felting.

It wasn't as deep brown as I had hoped -- even an equal weight of black walnuts and wool apparently is not enough for a really dark brown -- but it looked pretty nice.  For the next batch, I used the same black walnut dyebath and added half a container of instant coffee.  This made a slightly redder brown than the first brown, but the difference wasn't very noticeable.

Then I took the two batches of brown wool, plus some white wool, and overdyed it all with food coloring -- a mix of green and a bit of red and yellow to make a somewhat olivey green.  This produced different shades of green and browny-green on each batch.  Last of all I did a little yellow, just in food coloring.

This is how it turned out on the Icelandic, which, because it was cleaner and already carded, took the color pretty evenly.


And this is how it turned out on the Rambouillet.  Like always happens with raw wool, for whatever reason, the tips took the color much more deeply than the rest, but this difference disappears when you card it.  A little lingering grease (despite so many washings!) also kept the dye from taking quite as well as it should have.


Next time I'll talk about how I blended and spun this gorgeous stuff.

Pulling out (my) hair: lots of llama

I had a little phase awhile back where I was completely out of anything spinnable.  Once you've gotten addicted to spinning, that's a terrible place to be.  You read spinning blogs and start eyeing the dryer lint.

But a friend of mine helped me out of this rut by giving me about three pounds of llama fiber.  Three pounds!  It was from three different animals -- one white with fawn bits, one light brown, and one chocolatey dark brown.

Llama is very easy to wash, unlike wool, because it has no lanolin.  So a swish or two in soapy warm water is fine -- no need to make it particularly hot and risk felting it, the way you do with wool.  But -- I discovered by trying it -- washing is actually not the first step.

Before washing, if possible, is when you should de-hair the llama.  Yes, llama has two coats -- a soft, spinnable undercoat, and an outer coat of coarse guard hairs which absolutely will not blend in with the undercoat and have to be removed.  There is no cool doodad for this that I know of -- you basically just have to pick it out by hand.  Some people use cards or combs, but it doesn't really speed up the process so far as I can see.

The good news is, it's not terribly difficult to do, if the lock structure is intact (i.e., you haven't tried washing it or otherwise messing with it too much) and it's a basically good batch.  The light brown was in this condition, so I just turned on a good bright light, grabbed the long hairs sticking out of the end of each lock, and yanked them out.  It helped that on this animal, the guard hairs were noticeably darker in color than the rest as well as being longer and more wiry.  Once the guard hair was out, the fiber changed from "hm, kinda scratchy" to "I want to snuggle with this all night" soft.

The staple length was quite short (like two inches tops) so it was a bit fiddly to spin.  Of course I made it harder on myself by spinning worsted (which is easier with longer fibers, I think) and going for laceweight.  It took forever, but hey -- I had no other fiber and a desperate need to be spinning, so it worked.

When I finished that, I wanted to do the chocolate brown, chunky and woolen this time -- only to hit an awful snag.  Either because of bad handling previously, or because the animal itself didn't have as nice a coat, it was basically impossible to dehair.  The hairs were completely blended into the rest of the fiber and virtually indistinguishable.  Then, even when I thought I'd gotten them all, they'd appear while I was spinning, refusing to lie flat and prickling out.  So much for my dream of soft fluffy yarn -- it wound up scratchy as heck.

Lesson learned: llama is more work than wool, because of the dehairing; it can be wonderfully soft; and sometimes you just get a bad batch and there's not much you can do about it.


Anyway, I made a hat out of it.  It wasn't soft enough to be a scarf, I thought, and it was rather hairy, but it was still a lovely color and made a good hat.

The white looks to be in good shape, so I think I've got a plan for it -- a shawl.  Since llama is not at all stretchy -- no good for socks, for instance, not by itself -- it works well in weaving.  I'd like to do a big rectangular shawl that shades between the white and the fawn colors of that fiber.  But I'll have to wait till I have a bigger loom, because I want a BIG shawl, something I can wear to nice occasions over a sleeveless dress.

Friday, June 27, 2014

Why handspun?

These days, there are machines that can make thread and yarn for us in no time at all, and for cheap.  When manufactured yarn is so easy to buy, why would anyone take the trouble to spin for themselves?  Why do people buy handspun yarn for their projects for so much more than they'd ever spend on something similar from the store?

Well, the reasons are as varied as the people who spin and buy handspun.  Here are a few.

1.  It's softer.  Fibers processed by machine are often broken by the rough handling, and the tension they are spun with takes out a lot of the spring in the wool.  If you think you don't like wool yarn because it's scratchy, you might like handspun.  I certainly can detect the difference.

2.  More variety.  If you are looking for commercial wool yarn, you're probably going to face the choice of merino, merino, merino, and ....... merino.  Or if you're really unlucky, some unlabeled thing that is way too scratchy to be merino and could be anything.  Handspun can be made of any kind of wool -- smooth, shiny Icelandic, crimpy, elastic blue-faced Leicester, or soft, lanolin-rich Rambouillet.  Or other fibers besides wool -- llama, alpaca, camel, angora, mohair, cashmere, linen, hemp, cotton ...... there is really no limit to the possibilities.  If you're more than a casual lover of fiber, you can try many different things and find out what you like best.

3.  More texture.  If you are making a fancy lace shawl, maybe you want a plain yarn.  But if you want to knit a simple scarf, you might want the yarn to be in the spotlight.  So you can make or buy art yarn with feathers or beads, thick-and-thin yarn full of slubs and bumps, corespun or boucle yarn with a fascinating texture.  It can turn plain knitting into something much more -- and you don't need to be a talented knitter, as I am not.

4.  More color.  The yarn at the store is limited in the colors available, and those colors will often be either stripes or heathered -- that's it.  But handspun yarn can be in any color or pattern you can imagine.  Each ply in a different color?  That's easy, and will give you a neat tweed effect.  But you could also have each ply making its own set of stripes.  You can have streaks of color twisting along your yarn, or a gradient from one end of the skein to another.  I'm still learning about color effects, but I already love getting to choose exactly the color and pattern I want in my yarn, and watching how it knits up or how it pools in a woven project.

5.  Supporting real people.  When you buy yarn or clothing at a store, your money goes to the store (a tiny fraction), a yarn corporation, and to the manufacturer -- which may be overseas.  When you buy from a person, all your money goes to them, and you don't have to wonder if you are supporting a clothing industry that isn't as ethical as it could be.  And of course handspinning is always carbon-neutral -- instead of burning coal and smogging up the sky, the spinner is burning calories and giving themselves a moment of enjoyment.  You can choose local yarn from sheep in your neighborhood, chemical-free yarn that's naturally dyed, or any other cause that interests you.  Why shouldn't your crafting projects support your values?

6.  It's just fun to work with.  I don't know if it's just the knowledge that something is handspun that makes you use it more intentionally, or if it's how incredibly beautiful it is, but it's a joy to watch handspun yarn on your knitting needles, your crochet hook, or your shuttle.  It's exciting to see the patterns coming out as you work, and it's a delight to feel the interesting and soft textures.  I'm afraid I've become spoiled -- I can't see using commercial yarn again unless I had to.  Even if it's a quality yarn and not some cheap acrylic stuff, it's just not as fun as handspun.

Did I miss anything?

Heavenly colors: felted blanket

I'm addicted to sunset colors -- red, orange, and yellow, the brighter the better.  So when I got some Icelandic roving for my birthday, I had to put in motion an idea I'd had for awhile -- a baby blanket in sunset colors, handdyed, handspun, handwoven, and felted.  This isn't a blanket to go over the baby -- it's something to put underneath to protect the bed.  Wool is water-repellent, especially if treated with lanolin, and so it is ideal for crib pads, diaper covers, and so forth.

Before I could even start, I had to figure out how much roving to dye.  It was a pretty narrow strip of roving.  How much roving would spin into how much yarn?  So I did a test spin -- tore off twelve inches of roving and spun it the weight I wanted.  I got seven yards, so to get about 150 yards of 2-ply, I dyed about 45 feet of roving.

Then I dyed a small section red, a small section yellow, and the rest I handpainted in shades of orange -- coral at one end shading to peach and apricot at the other.  As always happens when I dye with food coloring, the red was a bit pink, but that didn't matter to me.


I divided the roving into two batches, one for each ply, and arranged it so it went red, orange, yellow, orange, red ... and I spun it up!  It went really fast, and I was done and plied in three days.  I liked the way the plies softened the color changes, which were a bit abrupt in the single yarn.


Are those the most gorgeous colors ever, or what?

Then I dressed my loom.  The Ashford SampleIt loom is only eight inches wide, and I didn't want an eight-inch-wide blanket, so I made it two and a half yards long so I could divide it into three panels and sew them together.  My table worked well to measure out the warp -- at least, when I pulled one of the leaves out.


Since I was sewing together the panels horizontally, I kept all the pattern in the warp and used plain light brown llama for the weft.  I figured a brown weft would mute the colors just a bit, which is what happened.

Weaving always shocks me with how fast it goes.  I can see why historically it's always been more popular than knitting -- it requires less yardage and is done in a fraction the time.  So the blanket was all woven in a day and a half.


I cut it off the loom and measured it carefully into thirds.  Then I zigzagged, in red thread, on each side of the boundary where I was going to cut.  I hadn't left any extra space, so I couldn't have any raveling or fraying.


Then I quickly (for fear something would fray while I was working!) sewed the three panels together with leftover red yarn and added a single-crochet edging in the brown weft yarn.  That would help stop any raveling as well -- though the real security would be in the felting.

I felted the blanket by running it through a hot wash cycle in my washer.  However, I made a big mistake -- I let the cold rinse start without taking the blanket out.  When the cold water hit, the blanket distorted.  Sadly, it'll never be a real rectangle again.  Of all the stages to mess up, the felting is the worst!  It's too late to undo anything.


But, distorted or not, it's still gorgeous, colorful, and water-resistant.  It'll do.  And this baby I'm having in August will be my first child I have actually made anything for.  Knitted blankets take forever, and sweaters or buntings always seem too hard.  Weaving is quick and pretty simple, so I was able to finish this project in a week instead of letting it languish on knitting needles for months until I go into labor, like I did with projects for both my first two kids.

Wednesday, June 18, 2014

In over my head: raw Cormo

Once I'd learned to spin, I needed more wool in a hurry.  And I wanted a lot of it.  I was addicted to spinning and didn't want to have to stop again for lack of wool!

So I went to a fiber festival.  Of course I went to see the sheep and the llamas and the blown-glass spindles and everything .... but my main goal was to walk out of there with the maximum amount of wool I could afford.  I figured the smart thing was to buy raw wool, because I would be able to buy more of it.

That is more or less true.  You can get raw wool usually for a cheaper price per ounce than roving or rolags or batts.  However, the price of wool varies a lot, especially depending on where you're getting it.  A whole fleece direct from a farmer near you is likely to be cheaper than 4 ounces of raw wool bought on Etsy.  And the number of ounces you buy of raw wool might not be the number of ounces you end up with after washing and carding.  A whole fleece may need to be skirted -- that is, the grossest bits will have to be thrown away altogether.  And then the fleece gets washed, losing some weight in lanolin.  And finally some fuzzy bits will stay in your combs or carders.  There's no strict formula for how many ounces you'll get, so it's impossible to see if you're making a deal until you've spun the wool.  It might be, after all that work, that roving was cheaper!

So perhaps a more useful factor in the decision-making process is, do you actually want to process the wool or not?  If you process it yourself, do you want to buy tools (cards or combs) to do it?  Is there something specific you want to do (like special dyeing and blending) or are you happy with fiber you can find already prepared?  Another important question is, what can you find that is an actual good market price?  If all the roving you see is on sale and the raw wool is overpriced, well, that helps make up your mind too.

The more you buy and spin, the better you're able to judge what's good quality and what will give you more trouble than it's worth.  You learn what a good fleece looks like, and what is a dirty fleece that you're going to have to throw out half of.  You learn what good roving looks like and what's carelessly done and may need to be done over.  And, of course, you learn what a decent price for each is likely to be.

Well, I didn't know any of that, so I just cruised through the festival and touched everything, trying to figure out the very softest wool for the lowest price.  I ignored dyed and naturally colored wool, because I wanted to dye it, though perhaps this was a mistake -- black, gray, and brown wool is often cheaper and it's great to learn on.  And the natural colors have a lovely amount of variation that turns out very nice in the finished product.  I also ignored llama, alpaca, and camel, although they were cheaper, because I wasn't sure if they would be soft and easy to spin.  I finally settled on Cormo, which is a cross between Corriedale and Merino, because I found it at a good price, sold in bulk (they let me just pull what I wanted from a bag and buy it by the ounce), and ridiculously soft.

I didn't know that the softer wool is, the shorter the staple length, and therefore the more careful you have to be not to break your yarn and drop the spindle.  This stuff had only a 3 1/2 inch staple, so it was a real challenge.  I had to spin it thicker than I had with the Icelandic.  I also didn't know something I overheard in a forum months later -- "Cormo felts if you even look at it wrong.  Don't even THINK the word 'felting' while washing Cormo, or it will just to spite you."  Alas, how true those words were.

I read up on how to wash wool -- very hot water, Dawn dish soap, no agitation, lots of changes of water, and a constant temperature with no sudden shifts.  But when I did all that, it still stayed greasy.  I was buying wool in September, so presumably it had been shorn months ago -- the lanolin was hardened on and hard to remove.  So I cheated and stirred it around a bit and tried to rub it a bit -- which is what you should never do!  Sure enough, that batch (thank goodness I was washing it in batches instead of all at once!) turned tangly, sticky, and clumpy .... in short, it had felted rather a lot.  I managed to spin it anyway, but quite a few clumps had to be thrown out.

I had a revelation, thinking about how my laundry never gets that clean either, and realized the problem was likely my hard water.  Sure enough, when I collected some rain water and used that, I had much better results.  It's rather a hassle, but I've made it my standard procedure now.  Better to wait for a rainstorm and fill up a big stockpot of rainwater than face wool that never gets clean.  I've also learned that there is a point that is clean enough ... quite a bit of the dirt comes out in the processing, not the washing.  And last of all, you don't want to overcrowd the wool as you're washing it -- if it can't expand in the container, it won't release all its dirt.  I had the problem of dirt coming out of the wool on top and just sticking to the wool at the bottom of the pot, so now what I do is wash the wool in the pasta insert of my big pot.  I pull the wool out of the pot, dump the dirty water, add fresh, and put the wool (in the insert) back into the pot.  That way the dirt settles to the bottom without reattaching to the wool, and I can change the water easily without touching or stretching the wool.

That did work a great deal better, and the rest of the bits of dirt and hay came out later.

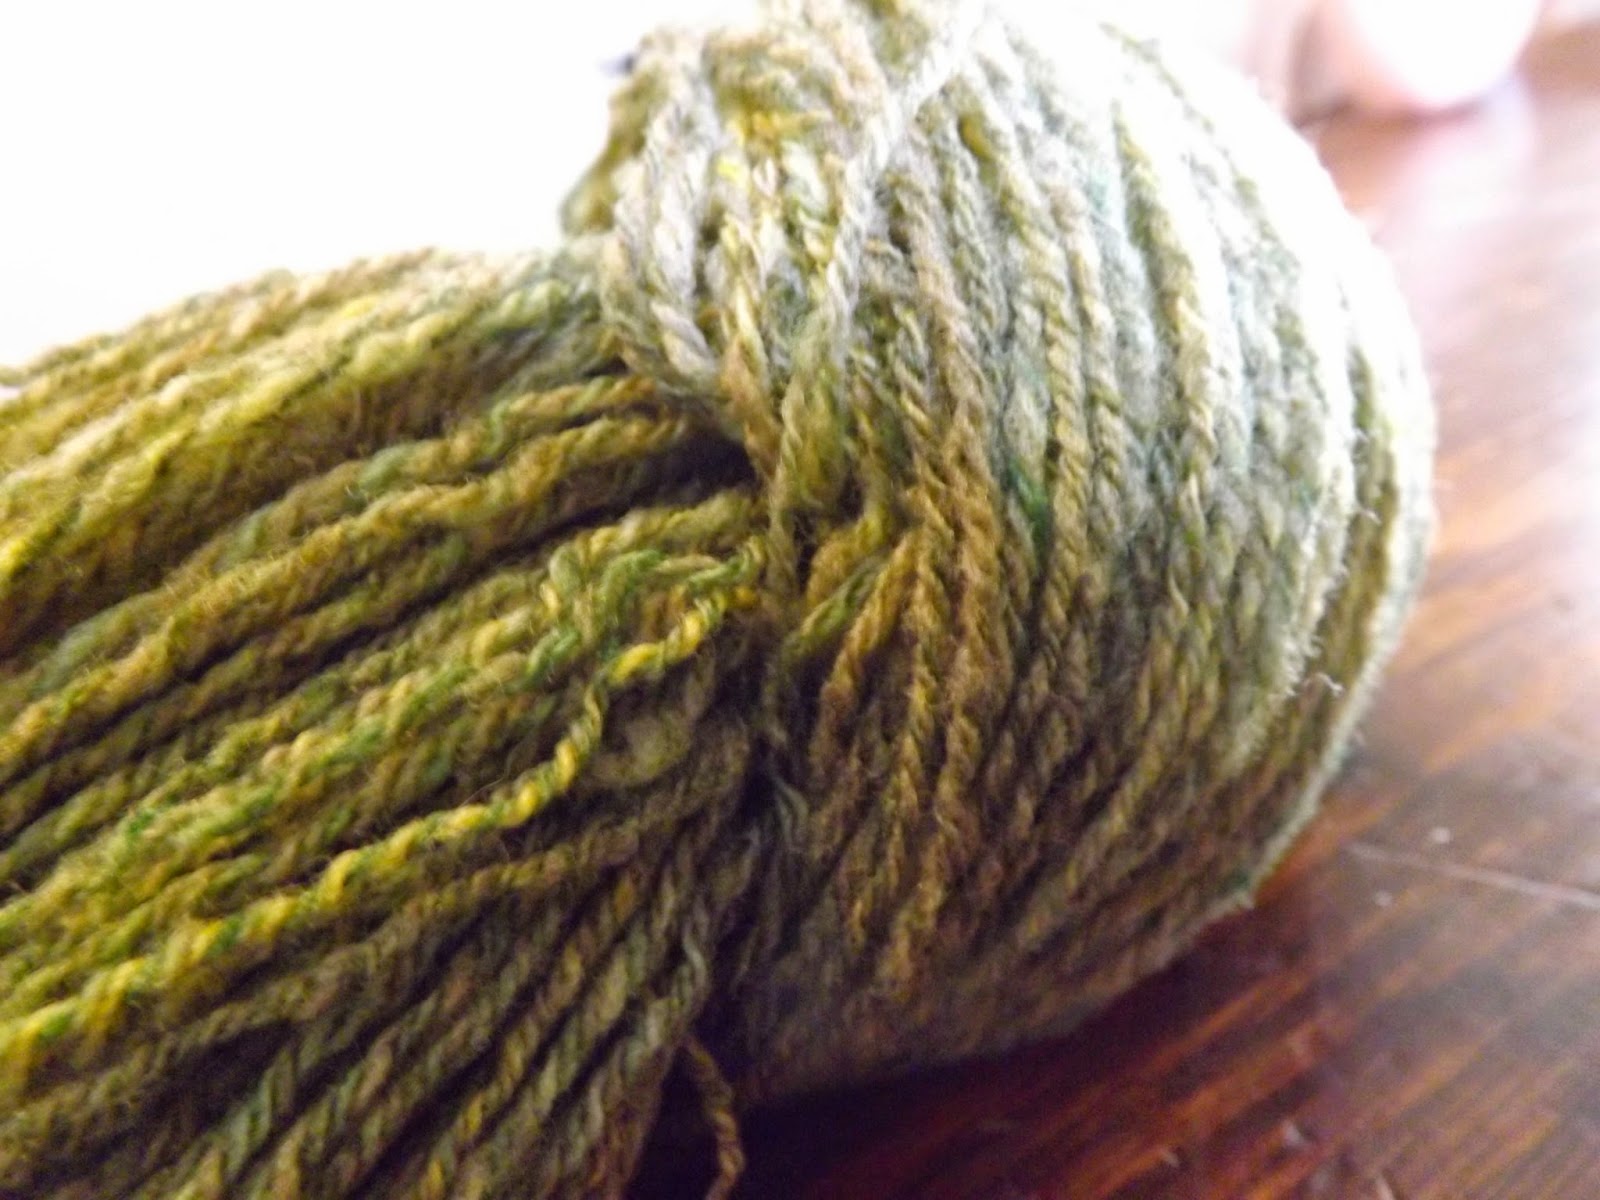
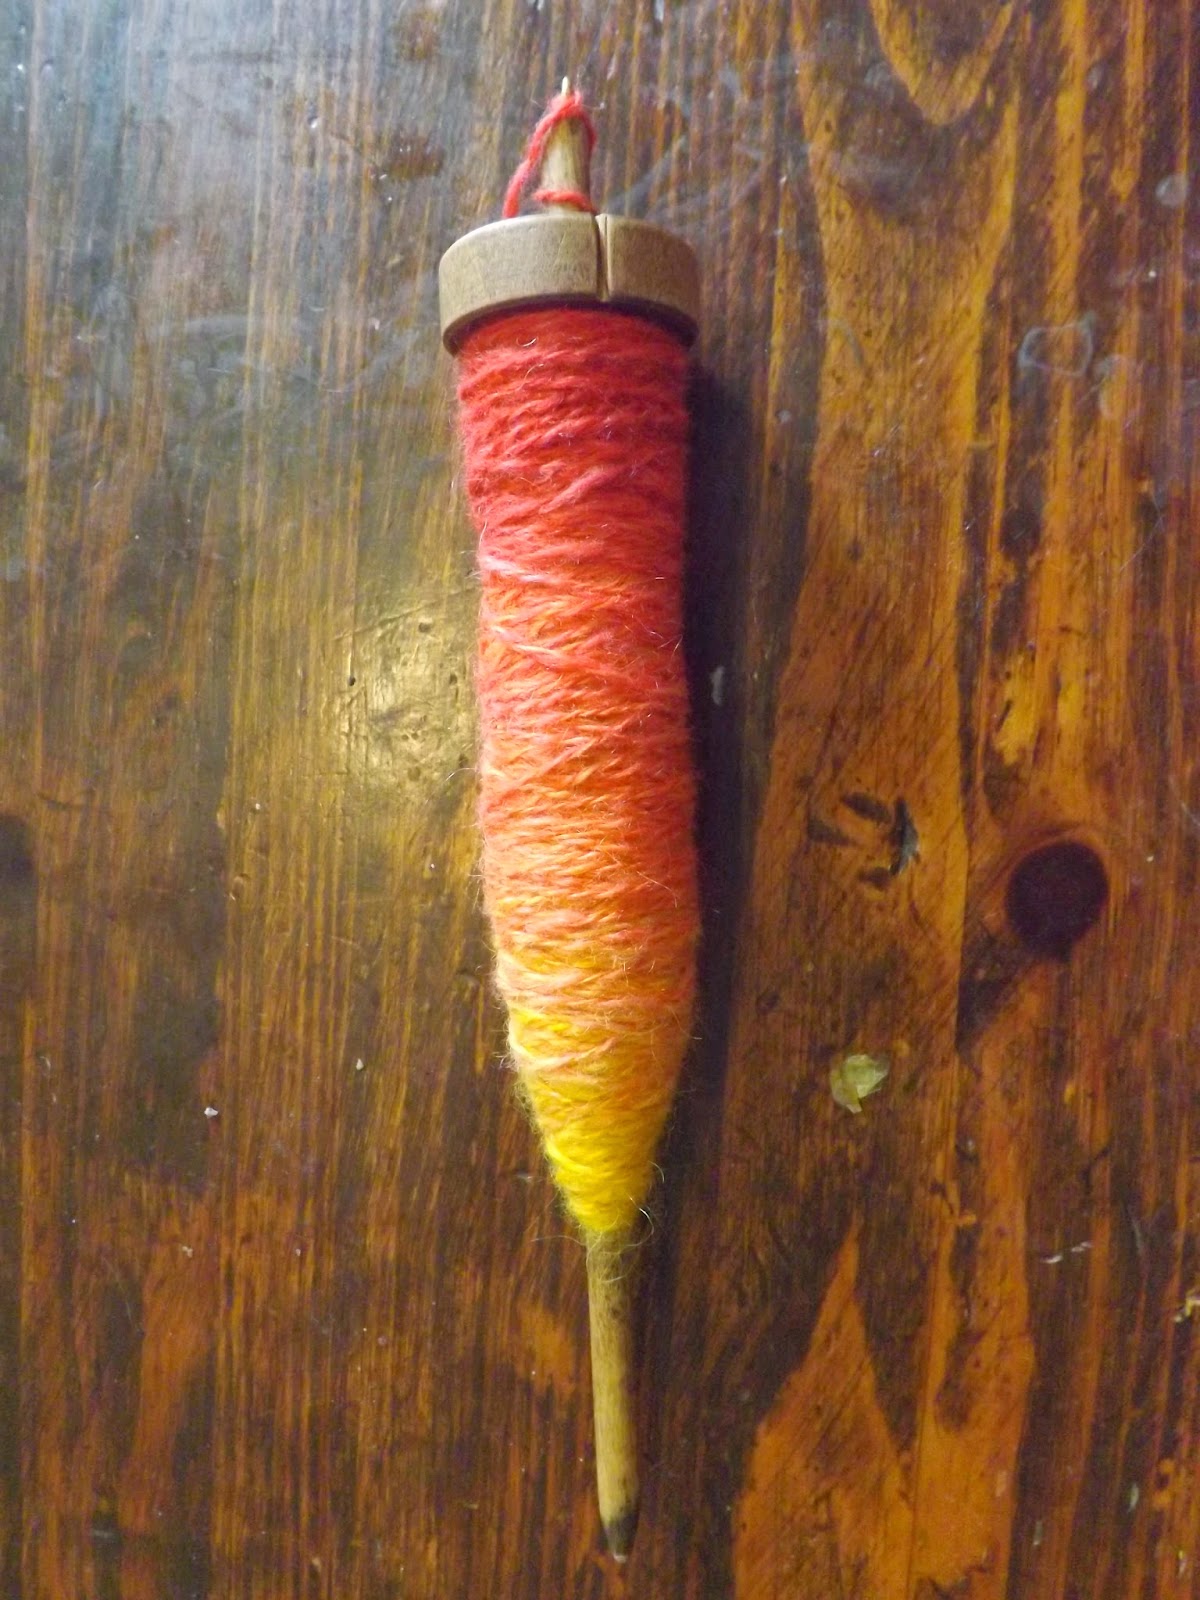
I dyed the wool with food coloring, which didn't turn out quite as I expected.  It turns out that red and yellow, which I'd done before, take pretty easily, whereas blue, which I did this time, doesn't.  It needs more vinegar, more heat, and more time than the other colors.  I also suspect that my wool was still a bit greasy, keeping it from holding the dye as well as it should have.  So I ended up with a very light, uneven blue .... but it was lovely all the same.


The next challenge was to find a substitute for combing or carding it, because I didn't have any supplies and couldn't afford to buy any.  This, at least, was simple enough -- you can just pull the locks apart with your hands, letting vegetable matter fall out, and then arrange them how you like.  For worsted spinning, you keep the fibers parallel, and for woolen, you make a perpendicular batt of them and then roll it up.  I just arranged the fibers on a piece of flannel so they didn't wander around.  It was admittedly pretty time-consuming, but if you are obsessed with spinning and on a budget, it's doable.  And it's what the ancients did, so far as we know -- spindles were in use for thousands of years for anything we can identify as a comb.  Though I must say, when I had a friend lend me some carders, my pace about doubled. 

So, it's safe to say that I was not ready for raw Cormo.  Still, the yarn I got was gorgeous.  Not very even, but ridiculously soft and squishy, especially after I'd washed it.  This is the stuff for scarves, wrist warmers, ear warmers -- anything where softness and thickness is desired.

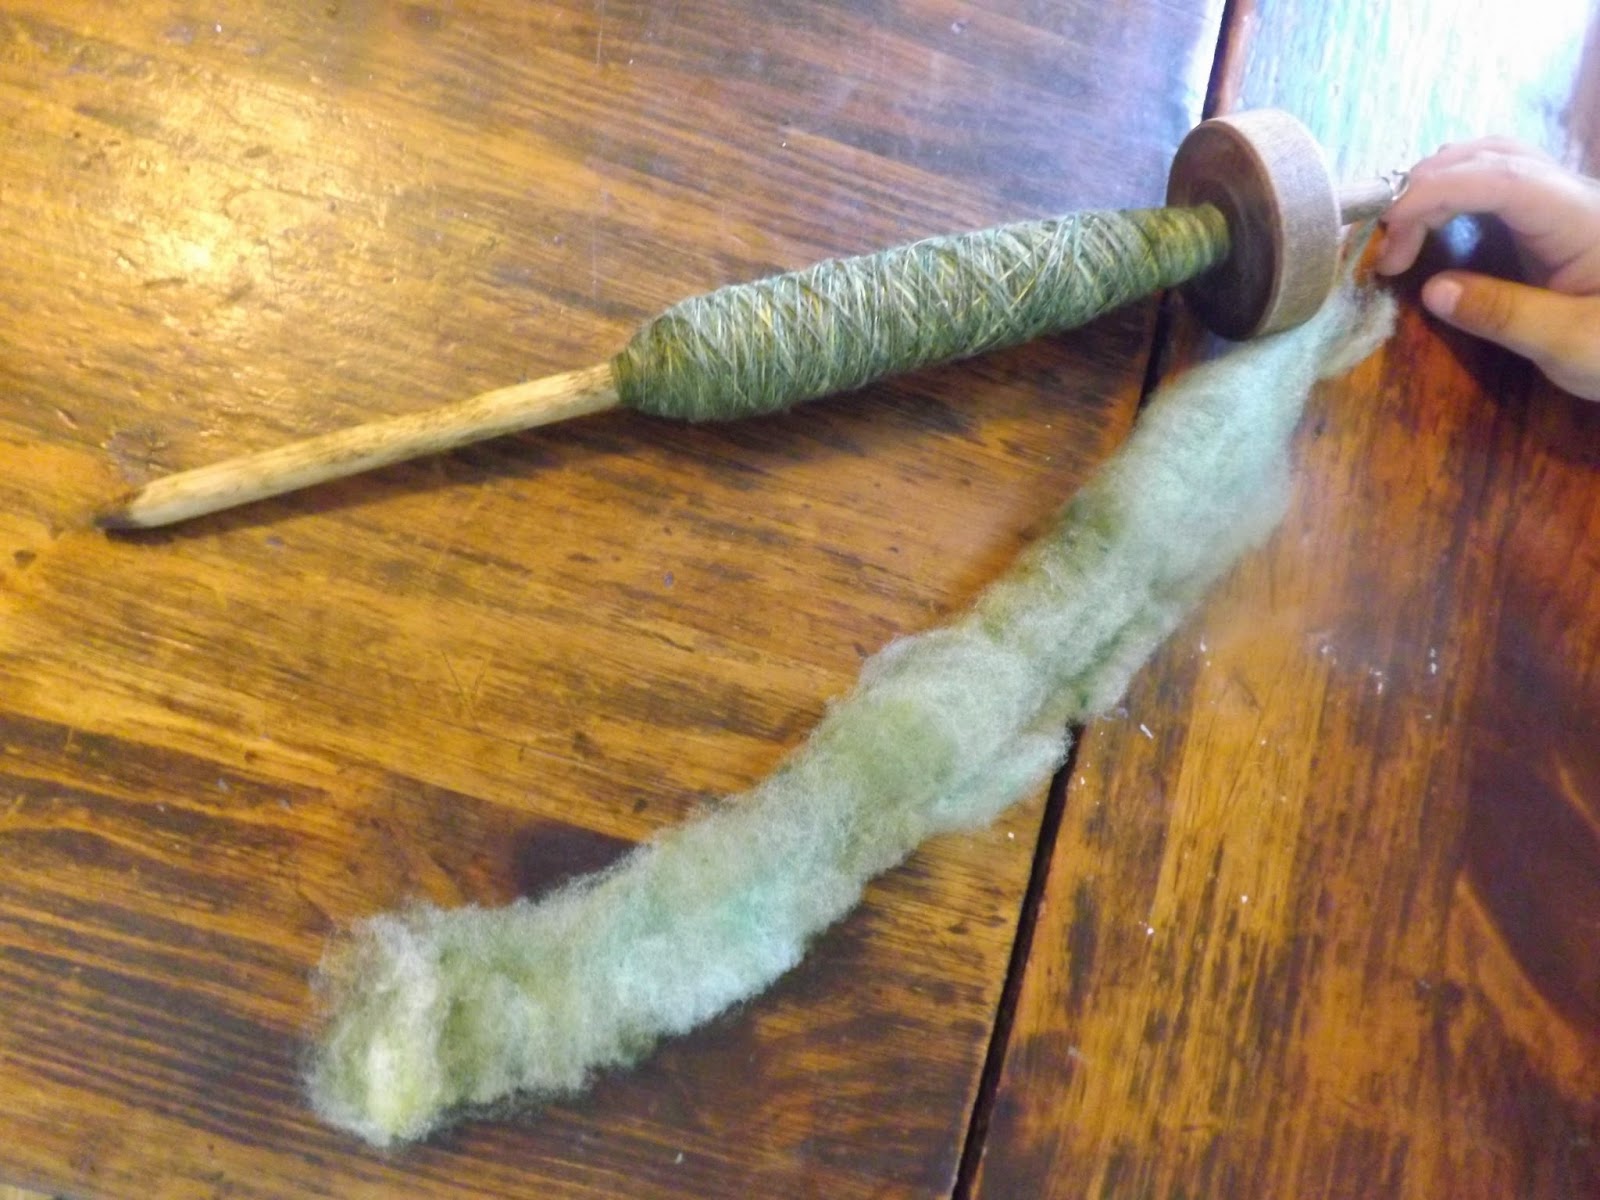
I did worsted first, but after awhile I realized that something this soft and short-stapled really would go better with woolen.  Unfortunately there are not a lot of instructional videos showing woolen spinning on a spindle.  There are no end of them on a wheel, but it's unclear how you're supposed to support the weight of the spindle with the half-spun yarn you're making.


The trick, it turns out, is to use your lower, spindle hand (for me, it's the left) to hold the spindle's weight and to transfer the twist steadily from the lower, finished yarn below your hand into the upper, half-spun yarn above it.  Then your fiber hand (my right hand) slowly stretches backward.  It seems at first that you have no control over how thick your yarn ends up, and you get a lot of thick and thin bits.  But after awhile I learned that I could control the thickness by carefully synching up how fast I pulled back with my right hand and how much twist I was pushing into the yarn with my left.  But really all I can say is, it takes practice!

My "big project" for this yarn was a woven scarf for my mother.  I made it on my Ashford SampleIt 8-inch loom.  Let me tell you, it took a lot less time to weave it than it did to spin!


Monday, June 9, 2014

Learning to spin: Icelandic top

I learned to spin with a kit from Etsy -- a simple top-whorl spindle, an instruction sheet, and four ounces of Icelandic top.

Icelandic sheep have a double coat -- a long, lustrous outer coat and a softer, fuzzy inner coat.  "Top" is combed fiber that contains only the long fibers.  The hank of fiber I got was pure white, smooth, and glossy, with a staple length (length of each hair) of about 8 inches.


A long, smooth fiber like this is good for spinning worsted, which is handy because worsted is (in my opinion) much easier to do on a drop spindle.  Most beginning spindle videos will show you how to spin this way.  It results in smooth, flat, strong yarn -- not fluffy, soft, lofty yarn.  We all love fluff, but worsted yarn is really the best choice when you want your color or stitches to stand out, or when you want something that's harder-wearing.  I generally prefer to spin long-stapled, coarser wool in a worsted style, and short, soft fibers get spun woolen - the fluffy way.   But there are no rules in spinning, so you can do whatever you want and see what gets you the results you like.

It was so easy to learn to spin with Icelandic that I'd recommend it to anyone.  I've spun a number of things since, and that top was the very easiest I've ever done.  It took me about a week to get the hang of it -- and spin up every little bit of that gorgeous fiber.  I spun it fine -- about 25 wraps per inch -- and plied it.  I was very sad to be done.  Spinning is addictive.  I should have bought a whole pound to start with!

I must say, though, I probably would have had a much more difficult time if I had been relying on a single page of photocopied instructions.  But I had already read Abby Franquemont's book Respect the Spindle, as well as watched a lot of good YouTube videos.

Awhile later I handpainted it in sunset colors.  It took the dye very well and looked gorgeous.  Some of it ended up in a hacky sack for my brother, and the rest became the edging of a baby hat for a friend's newborn.